Posture
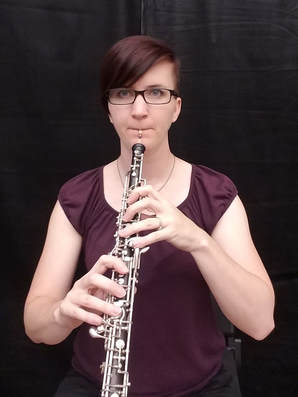
It is important to sit up with the instrument in the proper playing position to facilitate proper breathing, tone, and technique.
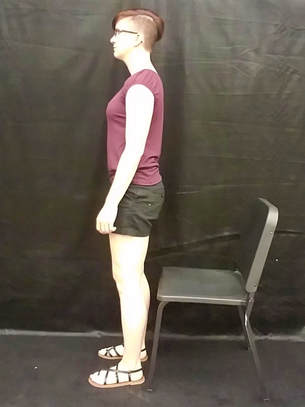
- Stand up in front of your chair with your feet shoulder width apart.
- Align the base of your neck, where it meets your back, over your hips and down to your ankles. Rock back and forth to feel the point where your body is most balanced.
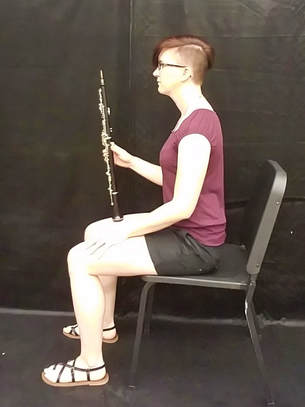
- Bend your knees and sit at the edge of your chair attempting to "stay standing from the waist up". Rock back and forth on your sitz bones (the bones at the bottom of your pelvis) to find the proper place your spine should be balanced on the chair. If you are not sitting on these bones the spine can become over-curved and cause the need for muscles to maintain balance. Over use of these muscles can lead to pain in both the upper and lower back.
- Make sure you are not straining to maintain an upright posture. Although you want a straight back to allow for proper breathing, tensing muscles to achieve this will cause tension in playing and become uncomfortable quickly.
- If your knees do not sit below your hips with flat feet at the edge of your chair angle them back slightly to ensure you are balancing on your sitz bones while seated.
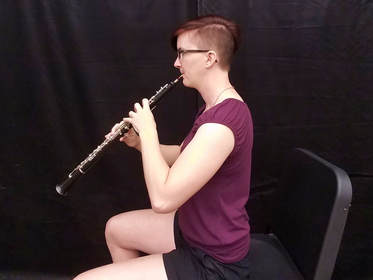
- Angle your oboe at 45 degrees from your body for proper playing position.
|
|
a note on Breathing
There is a significant amount of back pressure when playing the oboe. An oboe player will frequently need to exhale "stale" air out of his/her lungs before taking a new breath. Failure to do this results in a build up of carbon dioxide in the lungs and can make the player light headed.
When playing the oboe, breathe like you would during a normal conversation. Do not attempt to hold your breath before exhaling; always keep air moving in and out of the lungs naturally.
When playing the oboe, breathe like you would during a normal conversation. Do not attempt to hold your breath before exhaling; always keep air moving in and out of the lungs naturally.
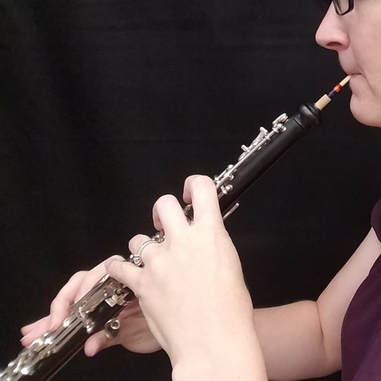
Hand Position
|
Left Hand
Hand should make a "floppy C" and come across the upper joint at an angle so the first finger is almost in line with the instrument. This will help facilitate the use of the first finger when a half hole is required. The thumb will rest below the octave key on the back of the instrument 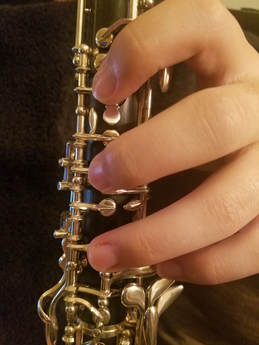
|
Right Hand
Spread the fingers wide so the keys are covered with the pads of the fingers and curve the hand in a C shape. The instrument should rest on the cuticle of the thumb on the thumb rest at the back of the instrument. 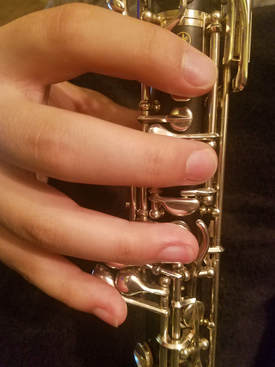
|
Half-hole Technique
For certain notes on the oboe it is necessary to partially vent the first hole at the top of the instrument usually covered by the first finger in the left hand. To do this, the player can choose from two techniques. Either the player can roll the finger onto the lower half of the key exposing the small hole in the key or slide down into the same position. Do not lift up the finger to release the entire key from covering the hole; only the pin hole needs to be exposed while the finger remains down. When to use the half-hole is indicated on the "fingering" page by a red dot over the top hole of the instrument.
|
Slide technique
|
Rotate technique
|
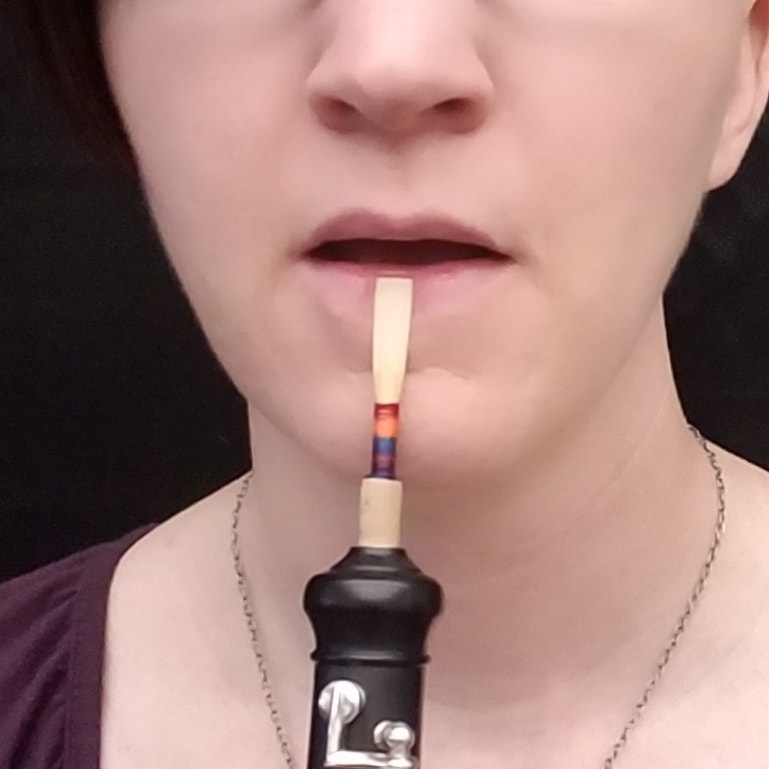
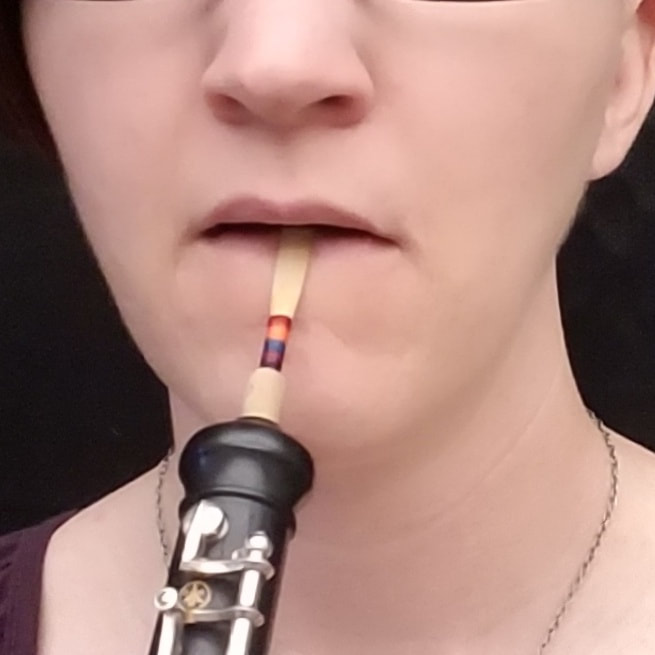
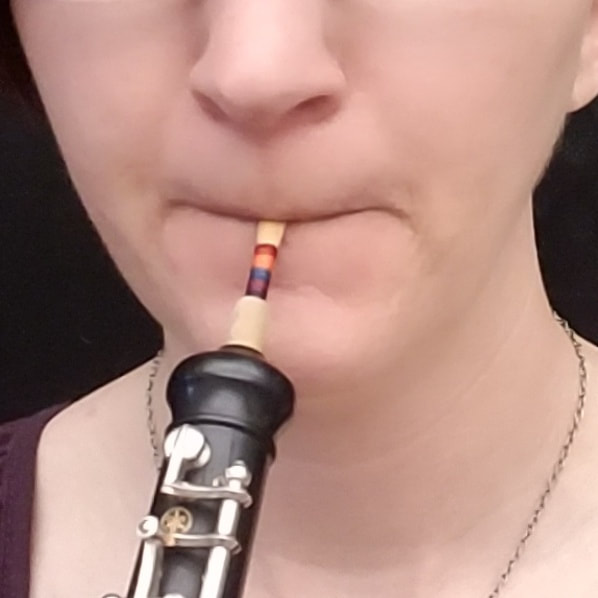
Embouchure
The embouchure is the shape your mouth makes to let the reed vibrate properly while playing.
- Place the bottom tip of the reed on the center of the bottom lip
- Use the reed to roll the lip in over your teeth
- Cover upper teeth with upper lip and form a seal around the reed.
- When forming the seal, stretch the upper lip down to make the seal (like a walrus covering his tusks)
- Try not to smile or bring your corners forward.
- When breathing, keep lower jaw on reed and drop chin to breathe.
|
|
|